
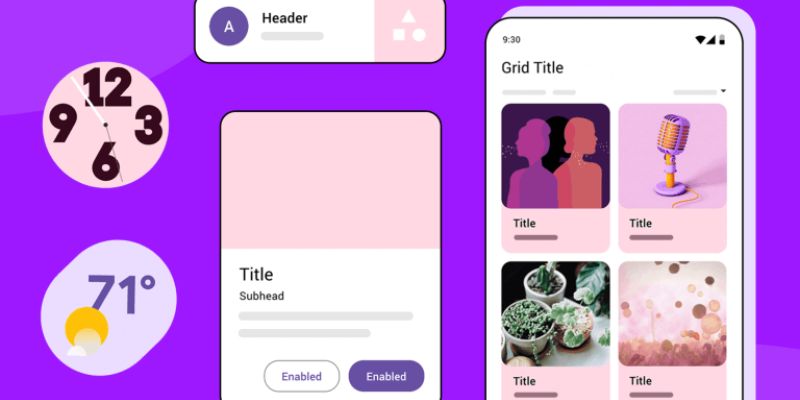
Material Design is a design language developeds by Google that focuses on creating intuitive, visually appealing, and user-friendly interfaces. It provides a cohesive framework to create apps with a consistent and polished look while enhancing usability. In this blog, we’ll explore how to implement Material Design in Android apps, helping you deliver a seamless user experience.
Material Design is more than just a design aesthetic; it is a set of guidelines that ensure consistency, responsiveness, and interactivity across apps. By integrating Material Design principles, developers can create Android apps that not only look modern but also feel natural to use. Let’s dive into the steps and components required to bring Material Design to life in your Android app. Boost your development skills with Android Training in Chennai, tailored to provide specialized instruction and expert guidance aligned with your career ambitions.
Set Up Material Design in Your Project
Add Dependencies
To use Material Design components, ensure your project includes the Material Design library. Add the followings dependency to your build.gradle files:
implementation ‘com.google.android.material:material:<latest_version>’
Replace <latest_version> with the most recent library version available.
Update Your Theme
Update your app’s theme in the styles.xml file to use a Material Design theme, such as Theme.MaterialComponents.DayNight.DarkActionBar.
<style name=”AppTheme” parent=”Theme.MaterialComponents.DayNight.DarkActionBar”>
<!– Customize your theme attributes here –>
</style>
Read more: Exploring the Intersection of Blockchain and Python
Use Material Components
Material Buttons
Material Buttons offer different styles, including text, outlined, and contained buttons. Here’s an example of a contained button:
<com.google.android.material.button.MaterialButton
android:layout_width=”wrap_content”
android:layout_height=”wrap_content”
android:text=”Click Me”
app:cornerRadius=”8dp” />
By enrolling in Android Online Training, you’ll acquire essential knowledge and skills needed to tackle real-world challenges in mobile application development.
Material Text Fields
Material Text Fields provide enhanced input fields with floating labels and error messages.
<com.google.android.material.textfield.TextInputLayout
android:layout_width=”match_parent”
android:layout_height=”wrap_content”
app:boxStrokeColor=”@color/primaryColor”>
<com.google.android.material.textfield.TextInputEditText
android:hint=”Enter your name” />
</com.google.android.material.textfield.TextInputLayout>
Read more: SEO Trends In Digital Marketing
Implement Material Navigation
Bottom Navigation
The Bottom Navigation Bar helps users navigate between primary app destinations.
<com.google.android.material.bottomnavigation.BottomNavigationView
android:layout_width=”match_parent”
android:layout_height=”wrap_content”
app:menu=”@menu/bottom_nav_menu”
android:background=”@color/white” />
Define the menu items in the res/menu/bottom_nav_menu.xml file. Advance your development skills with an iOS Course in Chennai, offering specialized instruction and expert guidance tailored to your career goals in mobile app development.
Navigation Drawer
Material Design’s Navigation Drawer is a sliding panel for app navigation. Use DrawerLayout in combination with NavigationView to implement it.
Add Material Design Animations
Ripple Effect
Material Design emphasizes motion for better user feedback. Add ripple effects to buttons and clickable items:
android:background=”?attr/selectableItemBackground”
Transitions
Use shared element transitions between activities or fragments for smooth animations:
android:transitionName=”shared_element”
Configure transitions in your activity or fragment using ActivityOptions or the Transition Manager. By joining an iOS Online Course, you’ll gain essential knowledge and techniques to tackle real-world challenges in iOS app development.
Style Your App with Material Theming
Material Theming allows you to customize colors, typography, and shapes.
Define Custom Colors
In colors.xml, define your primary and secondary colors:
<color name=”primaryColor”>#6200EE</color>
<color name=”secondaryColor”>#03DAC5</color>
Apply the Theme
Use these colors in your theme:
<item name=”colorPrimary”>@color/primaryColor</item>
<item name=”colorSecondary”>@color/secondaryColor</item>
Test for Responsiveness
Ensure your app adheres to Material Design principles on devices of various sizes. Use ConstraintLayout for adaptive layouts and test using Android Studio’s layout inspector. For those aiming to enhance their advanced skill set, an Advanced Training Institute in Chennai delivers comprehensive programs and hands-on learning opportunities.
Implementing Material Design in Android apps enhances both usability and aesthetics. By following these steps—integrating Material Components, using animations, and styling with Material Theming—you can create apps that feel polished and engaging. Adopting Material Design principles not only improves user satisfaction but also aligns your app with industry standards. Start incorporating Material Design today to elevate your app’s appeal and functionality!
Read more: How to Create Wireframes and Prototypes in UI/UX Design?